Picture this: you’ve just published a new page, complete with beautiful, high-resolution images meant to capture your audience. You check your site speed report, and your heart sinks. The load time is a crawl. That vibrant hero image you spent hours perfecting is now the very thing causing visitors to bounce before your content even has a chance to shine. I’ve been there, staring at a failing Core Web Vitals score, knowing my visuals were the culprit.
Your images feel like a paradox. They are essential for engagement, yet they are often the heaviest, most damaging elements on a page, directly impacting metrics like your Largest Contentful Paint (LCP). Many people run their photos through a simple compression tool and think the job is done. This approach, however, leaves a massive amount of performance and SEO potential on the table, a costly oversight in a competitive search environment.
This is where we turn that around. I’ll show you precisely how to convert those performance anchors into SEO powerhouses. You’ll learn the practical steps for implementing the modern WebP format for superior quality and size, the right way to use lazy loading without disrupting the user experience, and how to write alt text that serves both accessibility and Google’s image search.
Why Image SEO is a Non-Negotiable for Performance
I once worked on a beautiful website for a boutique furniture maker. The product photos were stunning, professionally shot, and captured every handcrafted detail. We launched the site, and it looked incredible… on our office Wi-Fi. Out in the real world, the analytics told a different story: the bounce rate was astronomical. Visitors were leaving before the pages even had a chance to load.
The culprit? A collection of massive, uncompressed PNG files. That gorgeous hero image on the homepage was single-handedly destroying the page’s Largest Contentful Paint (LCP) score, one of Google’s Core Web Vitals. To a search engine, a slow LCP is a clear signal of a poor user experience. And pages that provide a poor experience don’t get rewarded with top rankings. It’s that simple.
Think about it from your visitor’s perspective. They won’t wait five seconds for your high-resolution banner to appear. They’ll just leave. But when you get this right, you don’t just keep visitors; you attract new ones. Optimizing your images for search—with the right file names and alt text—opens up a powerful acquisition channel: Google Images. For that same furniture client, once we fixed the images, their product photos started appearing in search, driving qualified buyers directly to their store.
This isn’t about making your images look grainy or cheap. It’s about finding the intelligent balance between quality and file size. It’s the foundational work that ensures your beautiful design actually helps you perform, rather than holding you back.
Harnessing WebP: The Superior Image Format for the Web
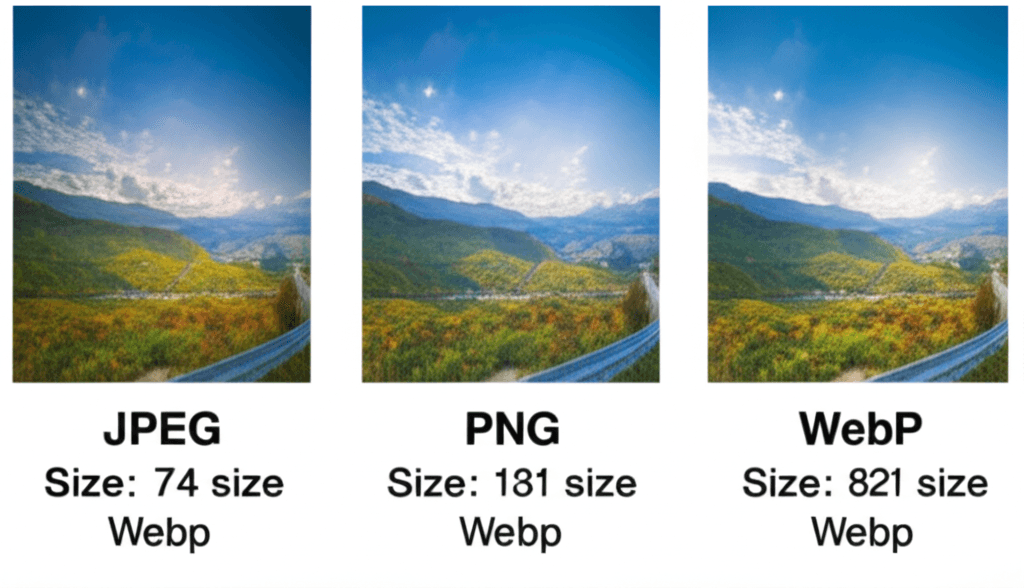
I remember spending hours, maybe even days, of my early career fighting with Photoshop’s “Save for Web” dialog. I’d nudge the JPEG quality slider back and forth, trying to find that magical point where the file size dropped dramatically but the image didn’t turn into a blocky mess. It was a constant, frustrating trade-off between speed and beauty. My clients wanted a fast-loading site, but they also wanted their product photos to look crisp and professional. Speaking of which, that entire struggle is largely a thing of the past because of a format Google introduced back in 2010: WebP.
WebP is an image format built specifically for the web, designed to create smaller, richer images. Think of it as a hybrid that takes the best of both JPEG and PNG. It offers lossy compression, like a JPEG, routinely producing files 25-35% smaller than their equivalent with virtually no perceptible quality difference. It also supports lossless compression and transparency, just like a PNG, but at a significantly smaller file size. I once converted a client’s entire library of transparent PNG logos to lossless WebP and cut the total image weight on their homepage by half.
The old argument against it was browser compatibility. For years, developers were hesitant because Safari didn’t support it. That’s not a real concern anymore. Today, over 97% of global users are on a browser that can display WebP images. For the remaining few, HTML provides a simple, built-in solution: the <picture> element. This lets you provide a WebP source and a fallback JPEG or PNG, ensuring everyone sees an image.
How to Get Started with WebP
Making the switch is straightforward. You don’t need to be a command-line wizard, though you can be. Here are a few common ways to convert your images:
WordPress Plugins: If you’re on WordPress, plugins like Imagify or Smush can automatically convert your uploads to WebP and serve them to compatible browsers.
Online Tools: Websites like Google’s own Squoosh.app offer a simple drag-and-drop interface for converting images and comparing the quality side-by-side.
Command Line: For developers automating their workflow, Google’s `cwebp` command-line tool offers precise control over the conversion process.
Implementing Lazy Loading to Supercharge Page Speed
I once worked on a beautiful travel blog. The articles were fantastic, filled with stunning, high-resolution photos from around the globe. The problem? Each page was a beast, trying to load 30+ large images at once. Users on slower connections would see a blank white screen for what felt like an eternity. The bounce rate was through the roof. We had optimized the images themselves, but wait — there’s more to consider. The issue wasn’t just the size of the files; it was the timing of the request.
This is where lazy loading comes in. Think of it as just-in-time delivery for your images. Instead of forcing the browser to download every single image on a page upfront, lazy loading tells it to only download an image when it’s about to enter the user’s viewport (the visible part of the screen). This has a massive positive effect on your initial page load time and metrics like First Contentful Paint (FCP), because the browser can render the top part of the page almost instantly.
How to Get it Done
Years ago, this required clunky JavaScript libraries. Today, it’s often wonderfully simple. Modern browsers support native lazy loading with a single HTML attribute. By adding loading="lazy" to your image tag, you’re telling the browser to handle the logic for you. It’s an incredibly efficient, one-line fix for most situations.
For more complex needs, like custom animations or supporting very old browsers, JavaScript libraries and CMS plugins still have their place. Many WordPress optimization plugins, for instance, offer advanced lazy loading features that give you finer control over the process.
The One Critical Exception
Here’s the pro tip that many people miss: never lazy load images that are “above the fold.” This includes your logo, a hero banner, or any other primary image visible without scrolling. Lazy loading these critical images actually slows down the perceived speed. Why would you want to delay the most important piece of visual content? That main image is often your page’s Largest Contentful Paint (LCP) element, a core performance metric. For that travel blog, we applied loading="lazy" to every photo except the main header image. The result was a page that felt snappy and immediate, even though all the same content was still there, waiting just off-screen.
Mastering Alt Text: Accessibility and Search Visibility
I once audited a website for a small e-commerce shop selling handmade leather goods. Every single product image had alt text like “leather wallet buy now best wallet for men.” The owner was proud, thinking he’d cracked the SEO code. He was stuffing his target keywords into every available slot. He was trying to speak the search engine’s language, but he’d completely missed the point of the conversation. Here’s the part most people miss.
Alternative text, or alt text, isn’t primarily for search engines. Its main purpose is accessibility. It’s the text that a screen reader announces to a visually impaired user, describing the image so they can understand its content and purpose. Think of it this way: if your image fails to load, the alt text is what appears in its place. Search engine crawlers, which can’t “see” images, rely on this text in much the same way. When you write for the human experience, you naturally create the context search engines need.
The Anatomy of Great Alt Text
Writing effective alt text is a craft. It’s about being descriptive without writing a novel. Your goal is to convey the same information a sighted person would get from the image. For a photo on a blog about sustainable travel, don’t just write alt="hiker". Instead, try something specific and contextual: alt="Hiker with a recycled-material backpack looking out over the misty mountains of Peru at sunrise." This paints a picture, includes relevant concepts (recycled material, Peru), and serves both accessibility and search visibility without feeling forced.
Common Pitfalls to Avoid
Over the years, I’ve seen the same mistakes repeated. The most common are:
Keyword Stuffing: Just like my e-commerce client, this involves cramming keywords in. It creates a terrible user experience and can get you penalized.
Writing “Image of…” or “Picture of…”: Screen readers already announce that it’s an image. Adding these phrases is redundant and clutters the experience.
Leaving it Blank: This is the worst offense for an informative image, as it leaves visually impaired users with zero context.
There is one major exception. If an image is purely decorative—like a swirly background pattern or a generic divider line—you should use an empty alt attribute (alt=""). This tells screen readers to skip the image entirely, which is the correct and helpful thing to do. It prevents the user from being interrupted by descriptions of non-essential visual flair.
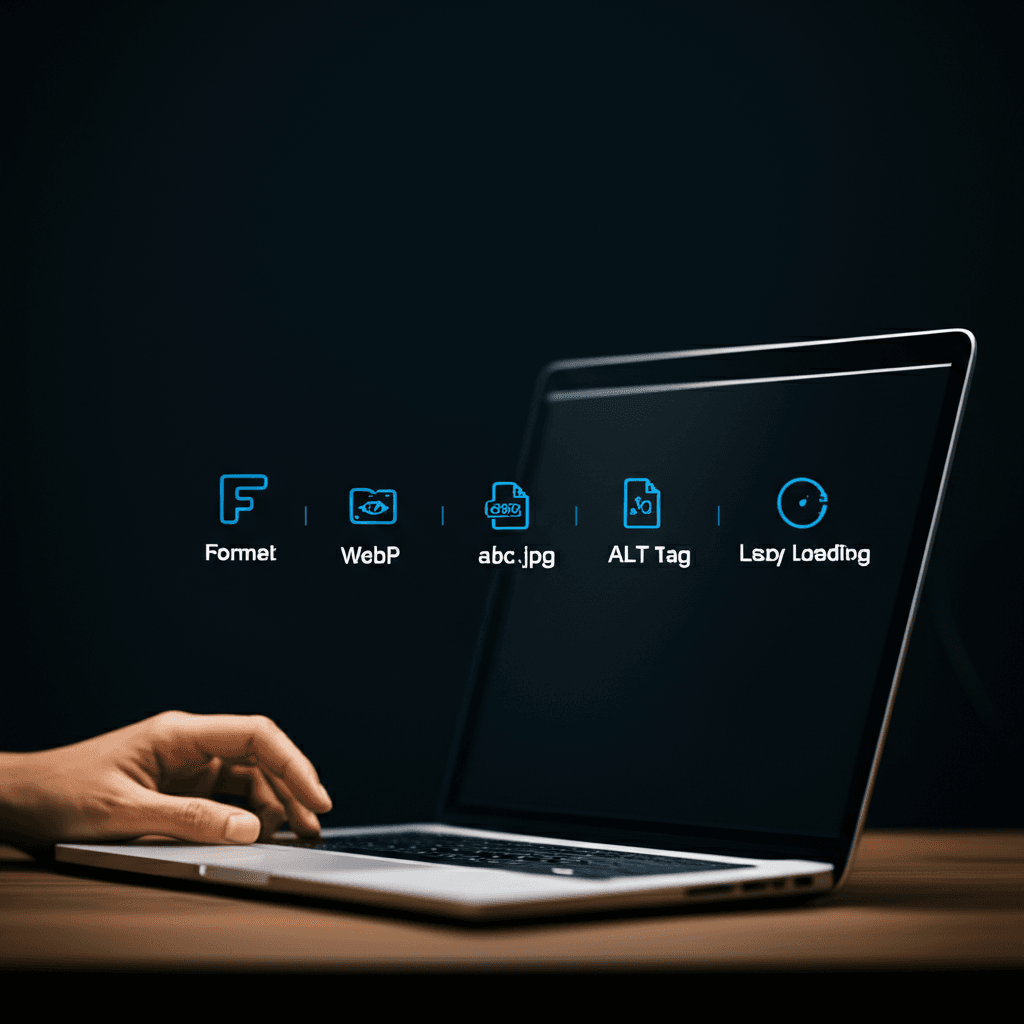
Your 5-Step Image Optimization Workflow
I once audited a beautiful e-commerce site that took nearly ten seconds to load. The culprit? A dozen product photos, each a 4MB JPEG straight from a professional camera. It was like trying to sip water from a firehose. After years of seeing this same mistake, I developed a simple pre-flight checklist. It’s a routine that turns image optimization from a chore into a quick, repeatable habit.
Step 1: Choose the Right Format
Before you do anything else, think format. My default is always WebP. It offers fantastic compression without turning your images into a pixelated mess. Most modern platforms handle fallbacks for older browsers automatically, so you can confidently use the best format available. I only stick with PNG when I absolutely need a transparent background.
Step 2: Resize and Compress
Never upload an image larger than it needs to be. If your blog’s content width is 800 pixels, resize your image to that width first. Then, I drag it into a tool like Squoosh to compress it. I play with the quality slider until I get the file size as low as possible without any noticeable drop in visual quality. It’s a bit more art than science.
Step 3: Use a Descriptive File Name
Search engines can’t see pictures, but they can read file names. This is your first and easiest SEO win. Don’t upload IMG_7890.jpg. Instead, tell Google exactly what it is before you even upload it: red-wool-peacoat-winter-collection.webp. This practice also keeps your media library perfectly organized.
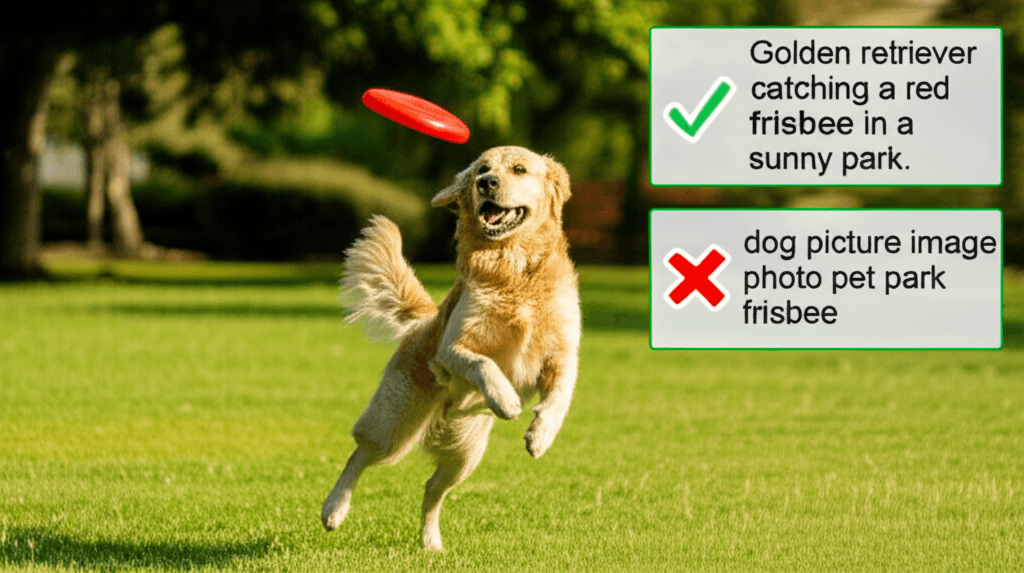
Step 4: Write Meaningful Alt Text
Your alt text should describe the image for someone who cannot see it. That’s its primary job. Think function and context. Instead of “dog,” write “Golden retriever catching a red frisbee in a park.” This helps with accessibility and gives search engines valuable context about your page content.
Step 5: Implement Lazy Loading
For any image that isn’t visible when the page first loads—anything “below the fold”—you should enable lazy loading. This tells the browser to wait to download those images until the user actually scrolls down to them. It dramatically speeds up that initial page load. Just be sure not to lazy load your main hero image; you want that to appear instantly.
Your Turn to Paint a Faster Picture
I once spent an entire week chasing server optimizations, convinced a complex technical issue was slowing my site down. The real culprit? A single, beautiful but uncompressed hero image. That was a humbling lesson. Treating your images not as afterthoughts but as core performance elements is the true heart of this practice. It’s about building a faster, more accessible experience that both users and search engines appreciate. The proof is in the performance.
Go run a Google PageSpeed Insights report on your homepage. Find that one oversized image and start there; you’ll see the impact immediately.
Frequently Asked Questions
What is the best image format for SEO?
WebP is currently the best image format for SEO and overall web performance. It offers significantly smaller file sizes than JPEG and PNG at comparable quality, which directly improves page load speed—a critical ranking factor.
Does lazy loading hurt SEO?
No, when implemented correctly, lazy loading helps SEO. It improves initial page load speed and key metrics like Largest Contentful Paint (LCP). However, you must ensure that Googlebot can still see the lazy-loaded content. Using native lazy loading (`loading="lazy"`) is the safest and most recommended method.
How long should image alt text be?
Alt text should be concise yet descriptive, ideally under 125 characters. This is not a strict rule, but it's a good guideline for screen readers. The goal is to accurately describe the image's content and function without stuffing keywords or being overly verbose.